Connecting Shelly to Optimaatti — step-by-step visual guide
Visual guide for step 4 of the getting-started flow. Use this if you need more detail on device connection settings or the connection does not work.
What you are doing
Shelly needs four connection details (server, port, username and password) to find Optimaatti. Once those values are saved, Shelly can report its state and accept commands. Shelly calls this section MQTT, but you do not need to understand the technology behind it.
Check you have these
- Shelly connected to your home Wi-Fi (getting-started step 3).
- Optimaatti account created and Connection details open (getting-started step 2).
- The four values memorized or open in another tab: server, port, username, password.
Option 1: Via the Shelly app (recommended)
Easiest and fastest. Works with all recent Shelly devices.
- 1
Open device settings
In the Shelly app, pick the device from the list and tap the gear icon or `Settings`.
- 2
Go to the connection section
In settings, find `MQTT` or `Advanced → MQTT`. The exact location depends on your Shelly model.
- 3
Turn the connection on
Flip `Enable MQTT` on. You will now see four fields: server, username, password and possibly an SSL toggle.
- 4
Enter the four values
Copy each field from Optimaatti's Connection details exactly as shown. Do not add spaces. If Shelly asks for SSL, turn it on.
- 5
Save
Tap `Save settings` or `Apply`. Shelly will restart the connection.
- 6
Wait 30–60 seconds
The device will connect to Optimaatti. Go back to Optimaatti and open the Devices page — it should appear automatically.
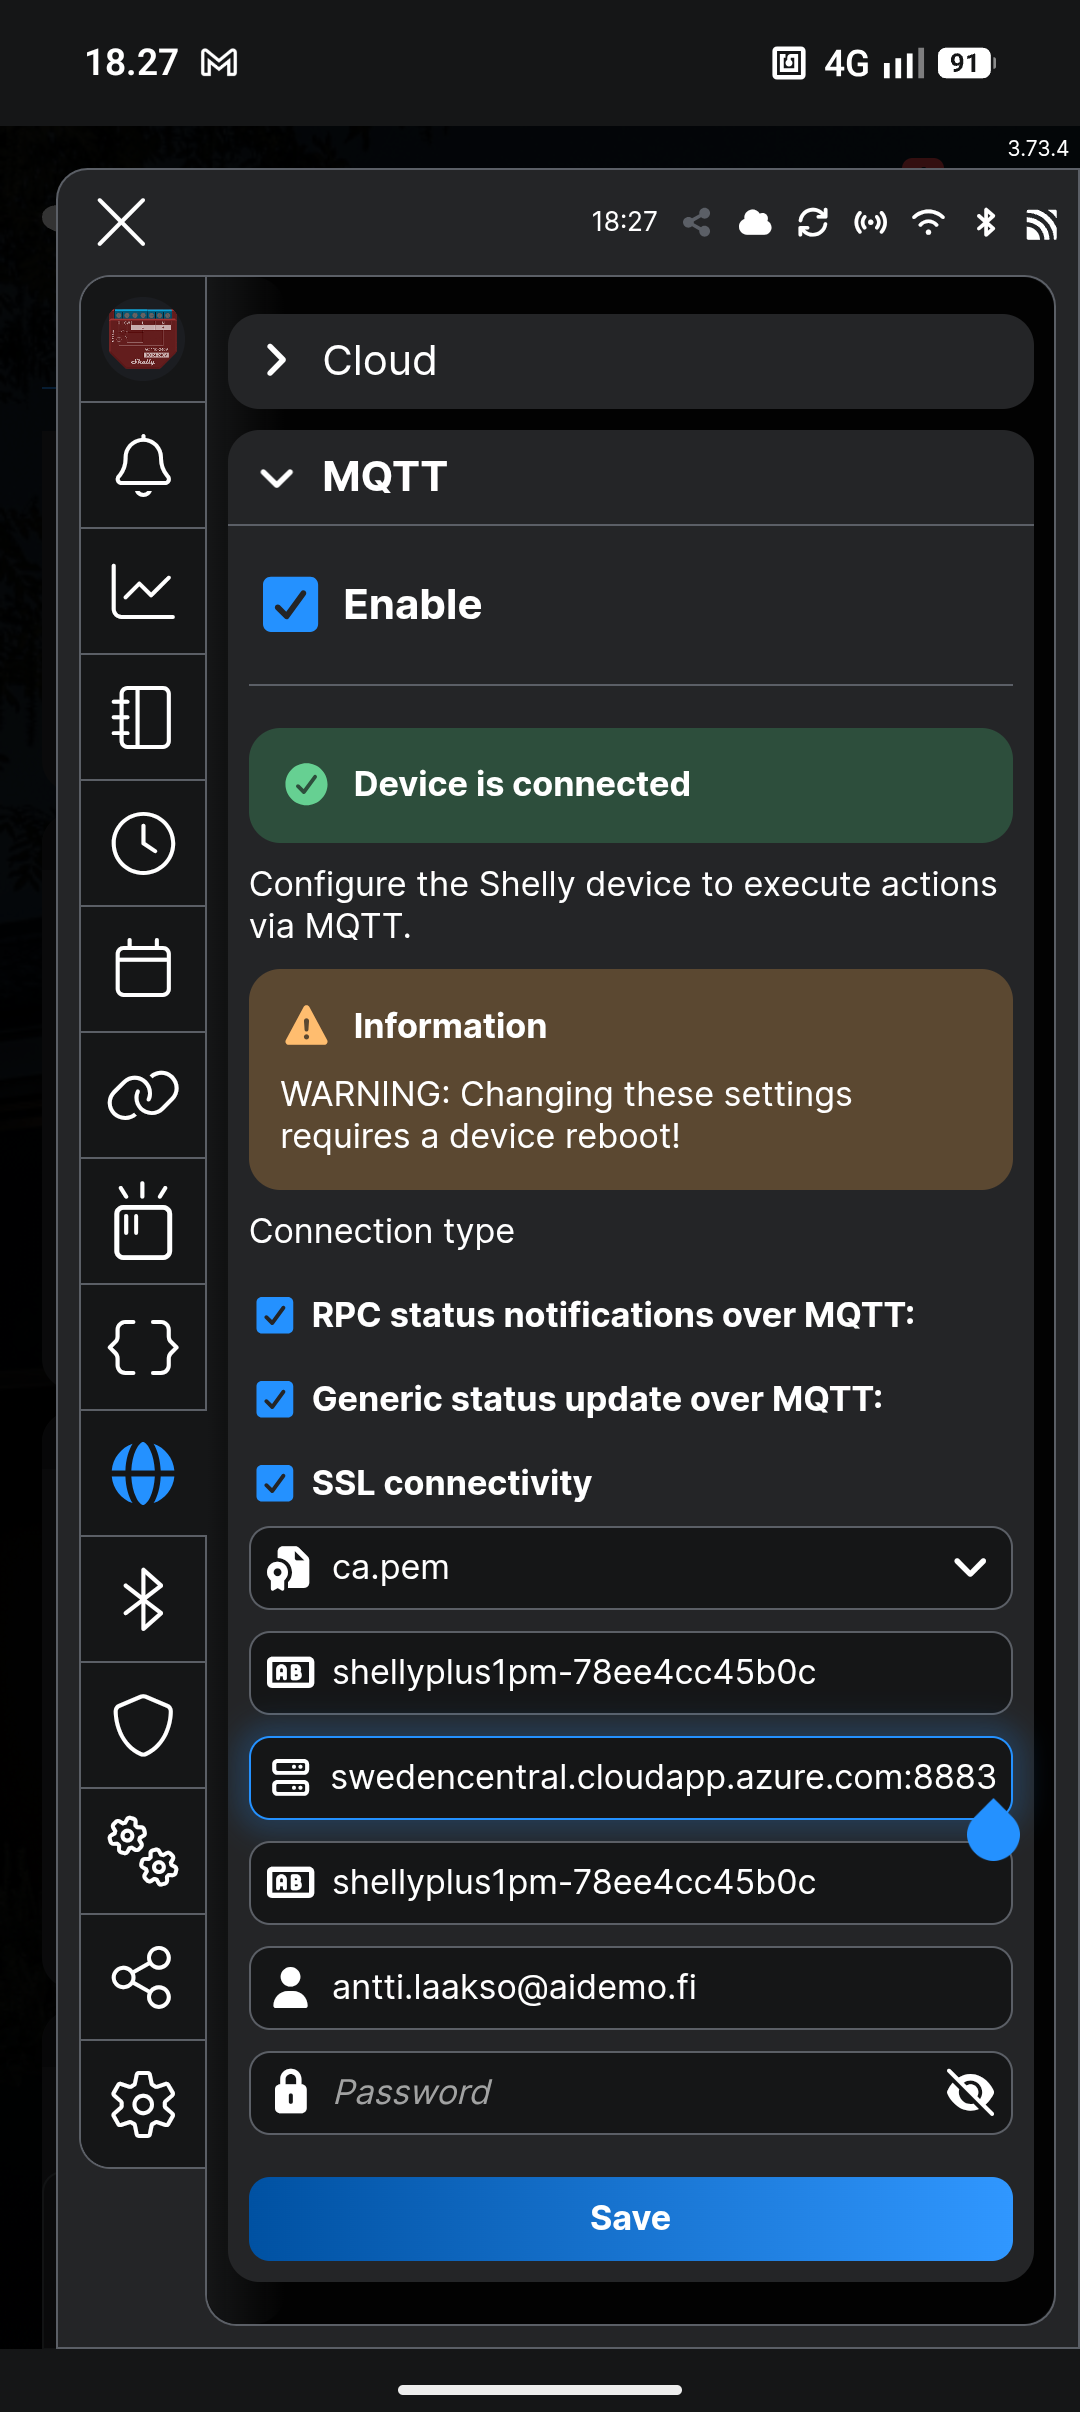
Check these in the screenshot:
- 11. Open device settings In the Shelly app, pick the device from the list and tap the gear icon or `Settings`.
- 22. Go to the connection section In settings, find `MQTT` or `Advanced → MQTT`. The exact location depends on your Shelly model.
- 33. Turn the connection on Flip `Enable MQTT` on. You will now see four fields: server, username, password and possibly an SSL toggle.
- 44. Enter the four values Copy each field from Optimaatti's Connection details exactly as shown. Do not add spaces. If Shelly asks for SSL, turn it on.
Show the more advanced browser method
Option 2: Via the browser
Only use this if the Shelly app cannot find the settings or you want to double-check details.
- Find your Shelly's IP address: it is in the Shelly app device info (Device info → IP) or in your router's device list.
- Open `http://<IP-address>` in a browser (e.g. `http://192.168.1.50`).
- Go to connection settings (`Settings → MQTT`).
- Turn the connection on (`Enable MQTT`) and turn `SSL connectivity` on.
- Enter the same four values as in Option 1.
- Tap `Save settings`.

Check these in the screenshot:
- 11. Find your Shelly's IP address: it is in the Shelly app device info (Device info → IP) or in your router's device list.
- 22. Open `http://<IP-address>` in a browser (e.g. `http://192.168.1.50`).
- 33. Go to connection settings (`Settings → MQTT`).
- 44. Turn the connection on (`Enable MQTT`) and turn `SSL connectivity` on.
Four-field checklist
If the connection fails, go through these one at a time:
Looks like: `mqtt.optimaatti.fi:8883`. Some models have server and port in separate fields — enter the server without the `:port` suffix and put the port in the port field.
Usually `8883` (TLS-encrypted). Never `1883` unless instructed.
The email address you registered with in Optimaatti.
A long random string that Optimaatti generates for you. DO NOT use your Optimaatti login password — the Connection details password is different.
Most common mistakes
- Space in the password
When you copy the password, paste it into a text editor first and check there is no space at the start or end. This is by far the most common cause.
- Wrong port
Port 8883 is TLS-encrypted, 1883 is plain. Choosing the plain port with TLS on (or vice versa) breaks the connection.
- TLS/SSL off
Many Shelly models have a separate `SSL connectivity` or `Use TLS` toggle. Turn it on.
- Expired password
If you generated a new password in Optimaatti, the old one stops working. Go back to Optimaatti, copy the latest value, and paste it into Shelly again.
- Wrong username
The username is the same email you log into Optimaatti with. Not the Shelly app email.
Is it working?
When everything is correct, you will see these signs:
- In the Shelly app connection view, it shows `Connected` or a green dot.
- In Optimaatti Devices, the device appears within 1–2 minutes.
- The device state updates in Optimaatti — you can switch it on and off from the app.
Next step
Once the device shows up in Optimaatti, continue to step 5 of the getting-started guide.
Still stuck?
If you cannot get a connection working even with these instructions, see the full troubleshooting guide or contact support.
Tip: keep the Optimaatti Connection details page open in another tab so you can copy values quickly.