Getting started
Start with one device and one simple automation. Once that works, adding the rest of your home is easy.
What you need before you start
- Electrical installation: if the device needs wiring, always use a qualified electrician.
- Wi-Fi ready: your phone or computer is on the same home network that Shelly will use.
- Email access: you can open a possible verification email during registration.
- Keep it simple: start with one device first, such as a water heater or one heater.
What happens in this guide
- create an account and copy the MQTT details
- connect Shelly to Wi-Fi and open its settings page
- enable MQTT and confirm the device appears in Optimaatti
- create your first automation and verify it works
If something goes wrong
Most setup issues come from the wrong Wi-Fi, a typo in MQTT details, or simply not waiting long enough for the first connection. You can find the exact fixes on the troubleshooting page.
Create an Optimaatti account
You need an account to get MQTT details and to see your devices in Optimaatti.
- Open https://app.optimaatti.fi on your phone or computer.
- Choose Register and create your account with email.
- Open the verification email if one is sent.
- Sign in and keep the browser open for the next steps.
Copy the MQTT details
Shelly needs these details to send data to Optimaatti.
- Open the MQTT credentials page in Optimaatti.
- Keep these four values visible: host, port, username and password.
- Copy them in advance or keep the page open in another tab.
- Do not invent or change anything. Use exactly what Optimaatti shows.
Connect Shelly to your home Wi-Fi
The goal is simple: Shelly must be on the same network as your phone or computer.
- Power on the Shelly device according to its instructions.
- Open the Shelly App and follow the guided setup. This is the easiest option.
- Choose your home Wi-Fi and enter the Wi-Fi password.
- If you do not use the Shelly App, first connect to Shelly Wi-Fi and open http://192.168.33.1 in a browser.
- When setup succeeds, Shelly joins your home network.
Open Shelly settings in a browser
Next you need the device settings page so you can link Shelly to Optimaatti.
- Find the Shelly IP address in the Shelly App or in your router device list.
- Open http://<Shelly IP address> in your browser.
- If the page does not open, confirm your phone or computer is on the same Wi-Fi as Shelly.
- Once the settings page opens, continue to MQTT settings.
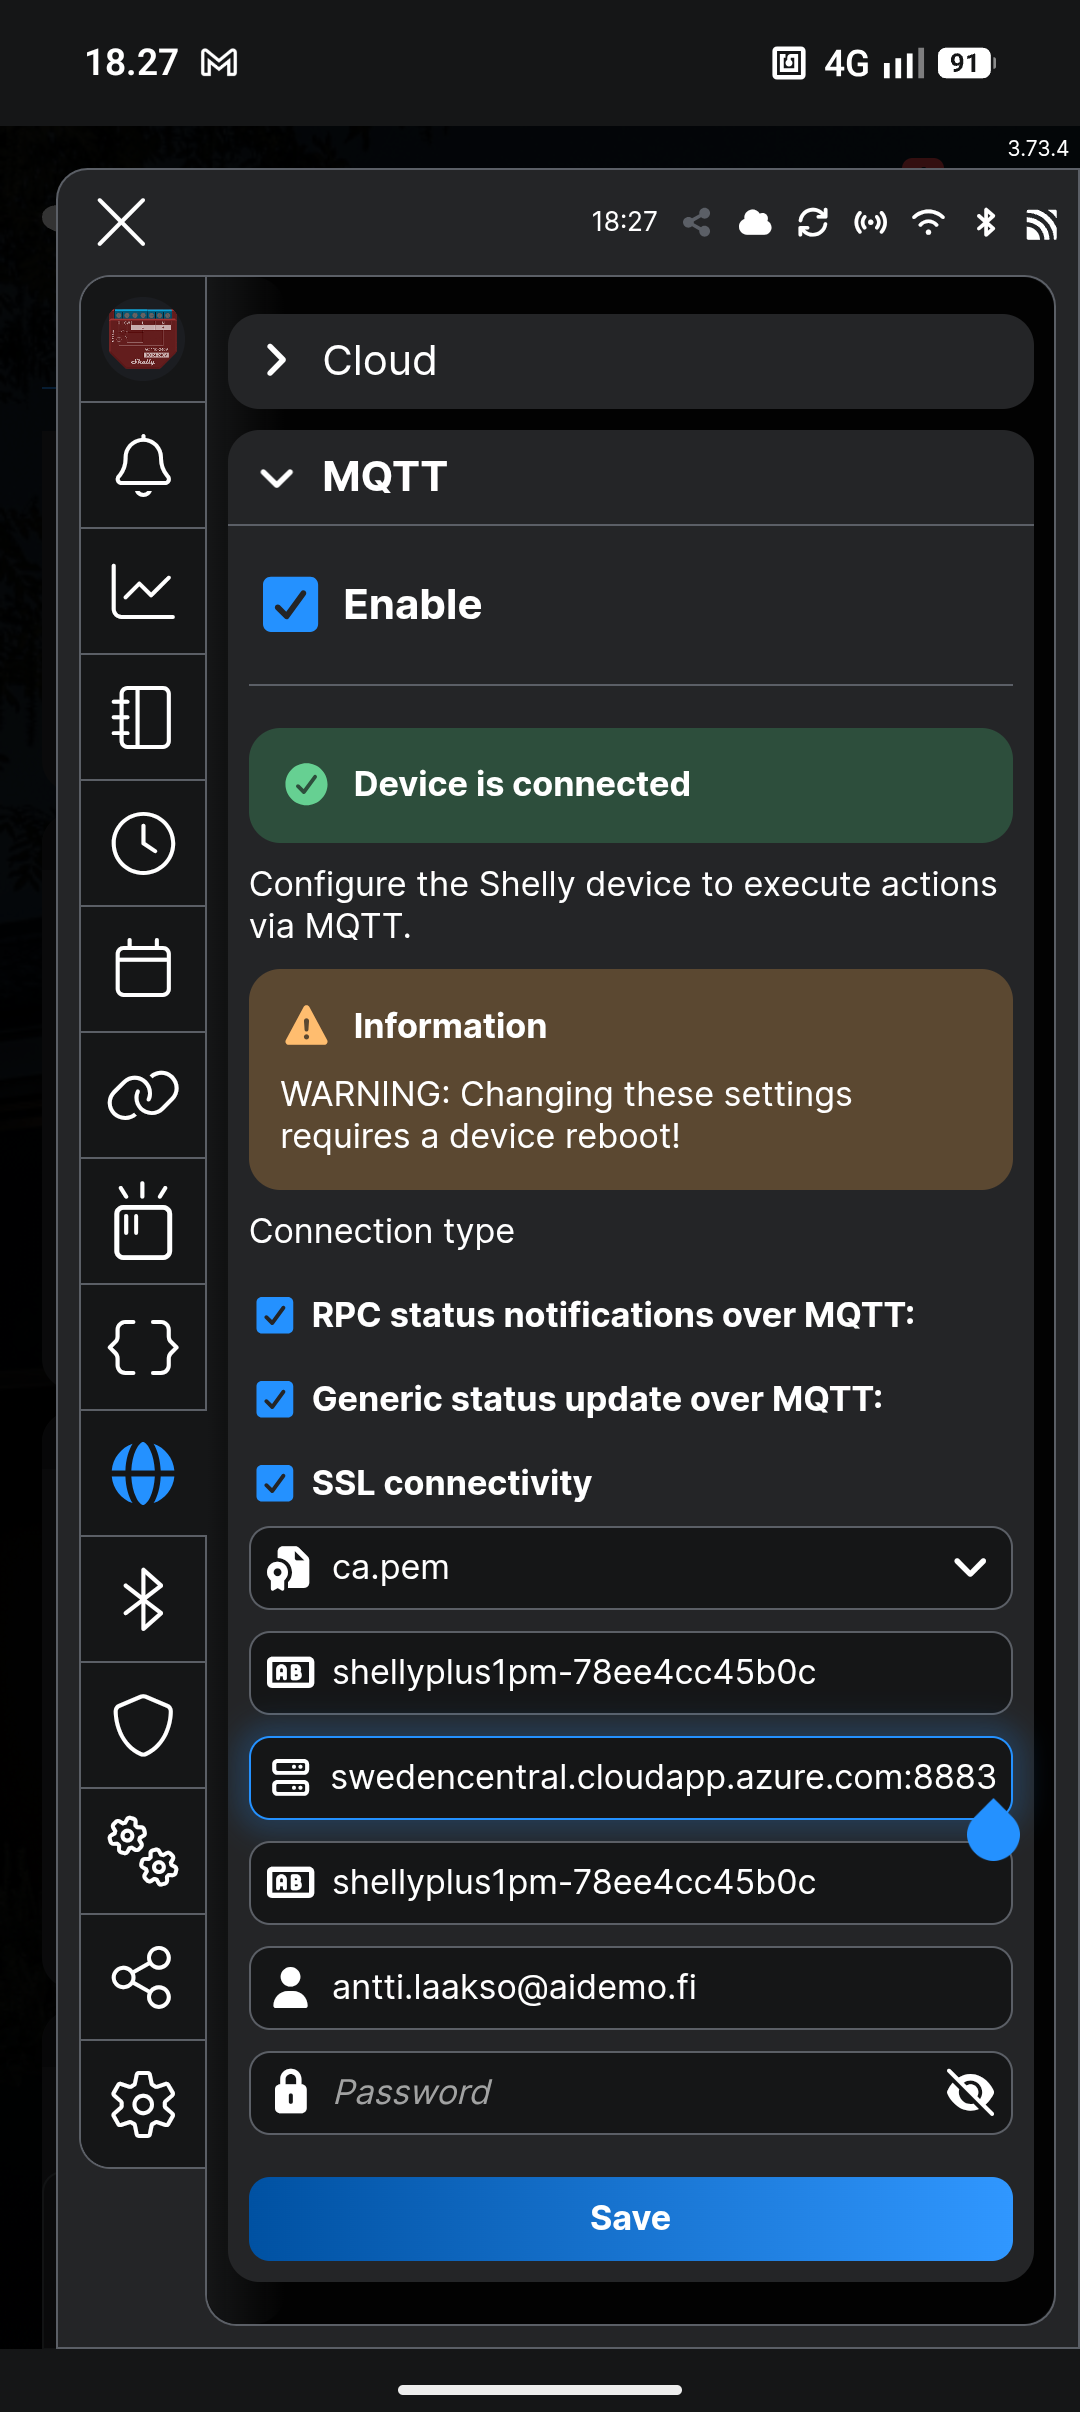
Enable MQTT on Shelly
This is where you tell Shelly how to find Optimaatti.
- Open the MQTT section in Shelly settings and turn MQTT on.
- Copy host, port, username and password from Optimaatti into the matching fields.
- Double-check for typos and extra spaces.
- Save the settings and wait for Shelly to connect.

Confirm the device appears in Optimaatti
Now you verify that the connection really works.
- Go back to Optimaatti and open Devices.
- Wait a moment. The first connection can take about 1-2 minutes.
- When the device appears, rename it to something clear, such as Water heater.
- If it does not appear, check the MQTT details and open troubleshooting if needed.
Fill in the most important device details
These details help reports and automations work correctly.
- Open the device edit view.
- Choose the correct device type and usage purpose.
- Enable energy metering if the device sends energy data.
- If this device controls heating, also enter power and add a temperature sensor if needed.
Create your first automation
This is the step where Optimaatti starts controlling the device during cheap hours.
- Open Rules and choose Create new rule.
- Select the device you just added.
- Start with a simple rule, such as cheapest hours.
- Save the rule and check the timeline to confirm a schedule was created.
Add optional improvements
Once the basic setup works, you can make the system more reliable and more advanced.
- Enable offline scheduling if you want schedules to keep working during internet outages.
- Add the second device only after the first one works reliably.
- If you control heating, you can later explore MPC in a separate guide.